Kia Carens: Body Side Moulding / Roof Side Moulding Repair procedures
Kia Carens RP (2013-2018) Service Manual / Body (Interior and Exterior) / Body Side Moulding / Roof Side Moulding Repair procedures
| Replacement |
[General Type]
|
|
| 1. |
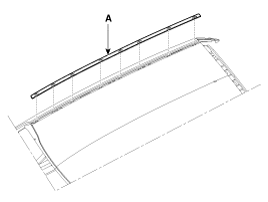
Using a screwdriver or remover, remove the roof side moulding (A).
|
| 2. |
Install in the reverse order of removal.
|
[Panorama Sunroof Type]
|
|
| 1. |
Remove the roof rack assembly.
(Refer to Body Side Moulding - "Roof Rack")
|
| 2. |
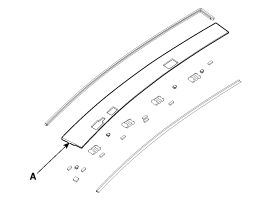
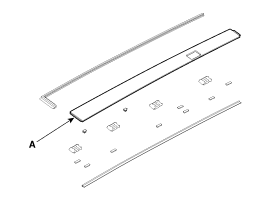
Using a screwdriver or remover, remove the roof side moulding (A).
[Front]
[Rear]
|
| 3. |
Install in the reverse order of removal.
|
 Roof Rack Repair procedures
Replacement
[General Type]
•
Put on gloves to protect your hands.
...
 Rear Spoiler Repair procedures
Replacement
•
Put on gloves to protect your hands.
...
Other information:
Kia Carens RP (2013-2018) Service Manual: Repair procedures
Removal 1. Remove the tailgate trim. (Refer to Body - "Tailgate Trim") 2. Remove the tailgate back panel. (Refer to Body - "Tailgate Back Panel") 3. Disconnector the c ...
Kia Carens RP (2013-2018) Owners Manual: 1. Activate Smart Parking Assist System
Press the Smart Parking Assist System button (the button indicator will illuminate). The Parking Assist System will be activated (the button indicator will illuminate). A warning sound will be heard if an obstacle is detected. Press the Smart Parking Assist System button again for more than ...
Copyright © www.kicaman.com 2015-2026


