
Kia Carens: Body Side Moulding / Roof Rack Repair procedures
Kia Carens RP (2013-2018) Service Manual / Body (Interior and Exterior) / Body Side Moulding / Roof Rack Repair procedures
| Replacement |
[General Type]
|

|

| 1. |
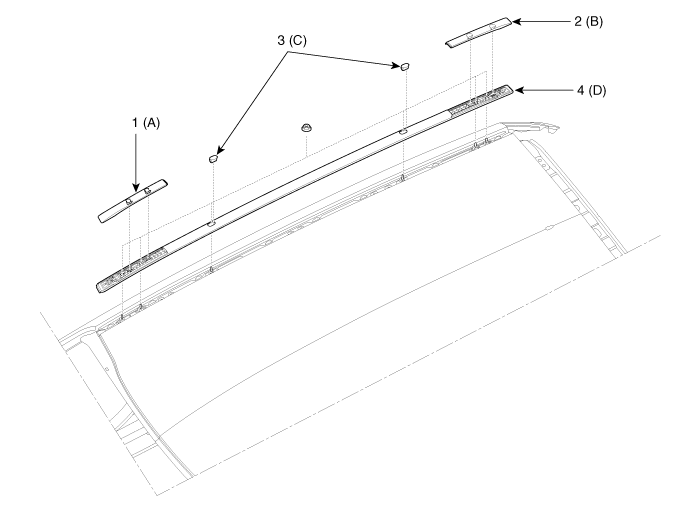
Remove the roof rack front cover (A) and roof rack rear cover (B).
|
| 2. |
Remove the side rail cover (C).
|
| 3. |
After loosening the mounting nuts, then remove the roof rack assembly
(D).
|
| 4. |
Install in the reverse order of removal.
|
[Panorama Sunroof Type]
|
|

| 1. |
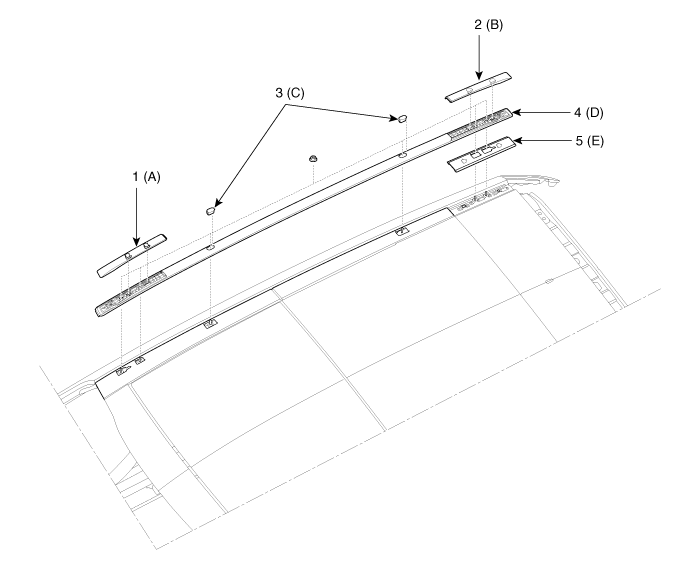
Remove the roof rack front cover (A) and roof rack rear cover (B).
|
| 2. |
Remove the side rail cover (C).
|
| 3. |
After loosening the mounting nuts, then remove the roof rack assembly
(D).
|
| 4. |
Remove the roof rear moulding (E).
|
| 5. |
Install in the reverse order of removal.
|

 Roof Side Moulding Repair procedures
Replacement
[General Type]
•
Put on gloves to protect your hands.
...
Other information:
Kia Carens RP (2013-2018) Service Manual: Front Seat Cushion Cover Repair procedures
Replacement • Put on gloves to protect your hands. • When ...
Kia Carens RP (2013-2018) Owners Manual: Interior light bulb replacement
Map lamp, Vanity mirror lamp, Room lamp, Luggage room lamp and Foot lamp 1. Using a flat-blade screwdriver, gently pry the lens from the interior light housing. 2. Remove the bulb by pulling it straight out. WARNING Prior to working on the interior lights, ensure that the light is off to avoid bur ...
Copyright © www.kicaman.com 2015-2026
