Kia Carens: Rear Seat / Rear Seat Cushion Cover Repair procedures
Kia Carens RP (2013-2018) Service Manual / Body (Interior and Exterior) / Rear Seat / Rear Seat Cushion Cover Repair procedures
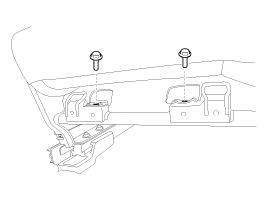
| Replacement |
[Second row seat assembly]
| (Except Europe and Australia) |
| [5-seat vehicle] |
|

|

| 1. |
Remove the second row seat assembly.
(Refer to Rear Seat - "Rear Seat Assembly")
|
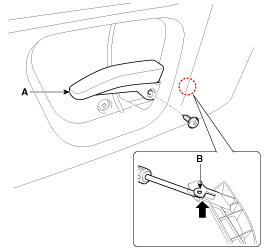
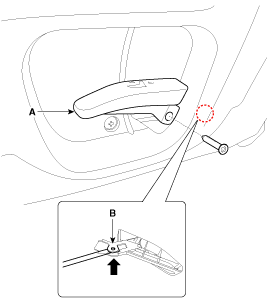
| 2. |
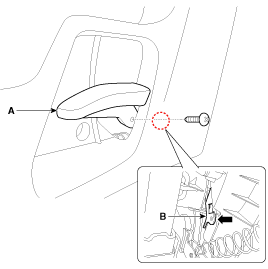
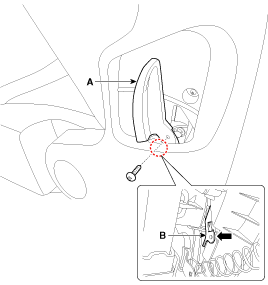
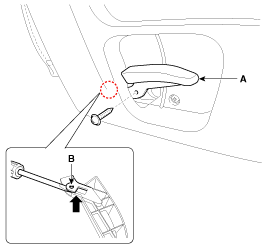
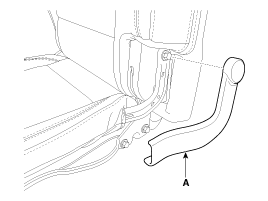
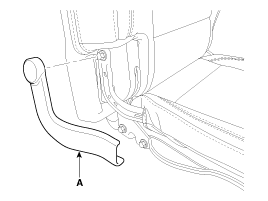
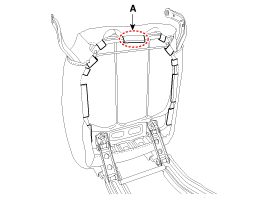
Loosen the rear seat recliner lever mounting screw.
|
| 3. |
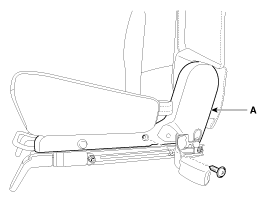
To remove the rear seat recliner lever (A), and then remove the rear
seat recliner lever after pushing the lock pin (B).
|
| 4. |
After loosening the mounting screws, then remove the rear seat shield
outer cover [LH] (A).
|
| 5. |
Loosen the rear seat recliner lever mounting screw.
|
| 6. |
To remove the rear seat recliner lever (A), and then remove the rear
seat recliner lever after pushing the lock pin (B).
|
| 7. |
After loosening the mounting screws, then remove the rear seat shield
outer cover [RH] (A).
|
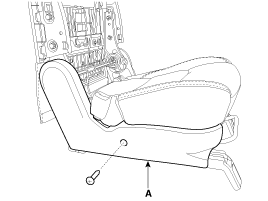
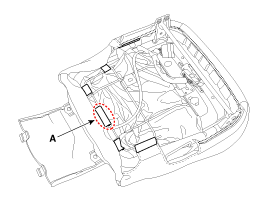
| 8. |
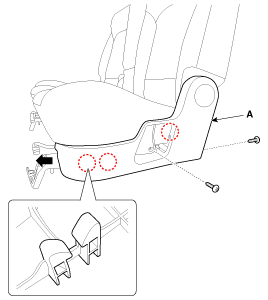
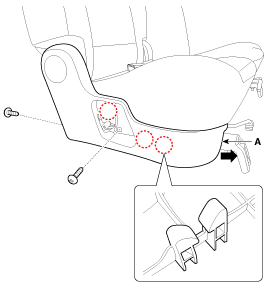
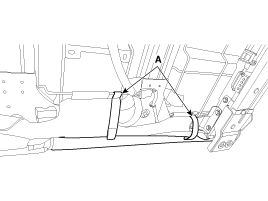
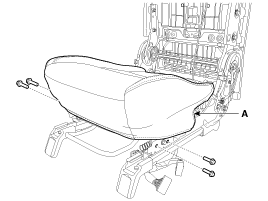
Remove the rear seat lower protector (A).
[LH]
[RH]
|
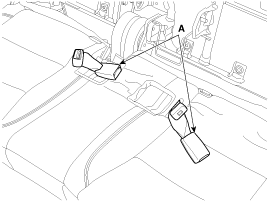
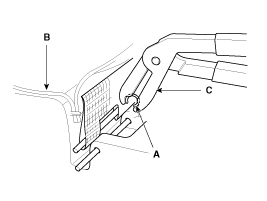
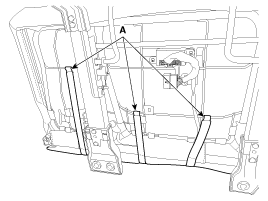
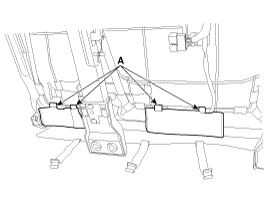
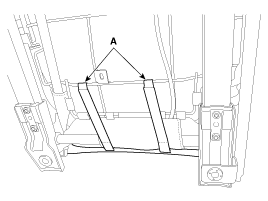
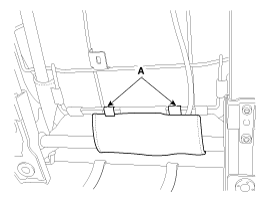
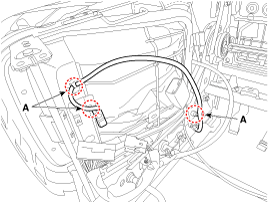
| 9. |
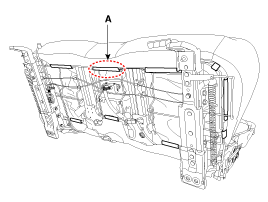
Pull out the hooks (A) by the rear seat cushion frame.
|
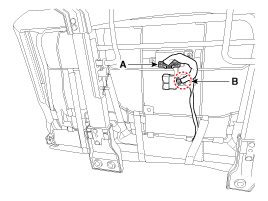
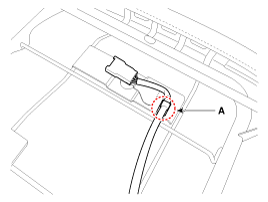
| 10. |
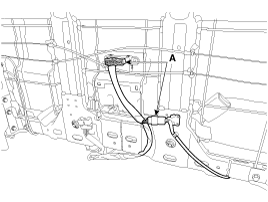
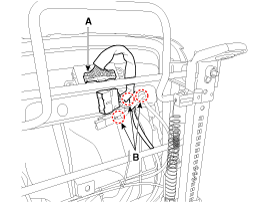
Disconnect the heater unit connector (A) and remove the rear seat cushion
frame mounting clips (B).
|
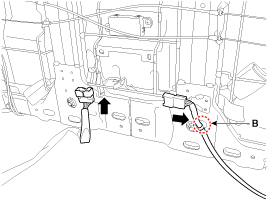
| 11. |
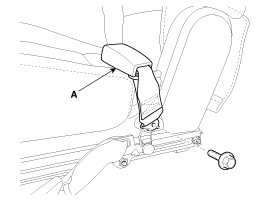
Pull out down the rear seat belt buckle (A).
|
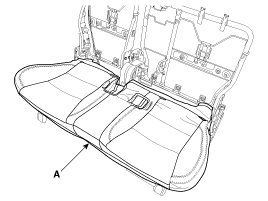
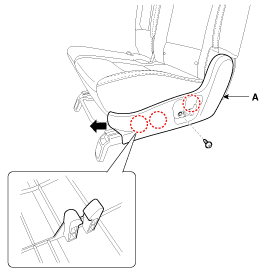
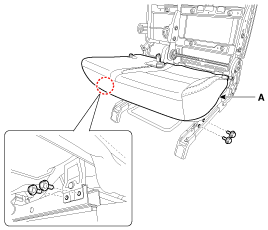
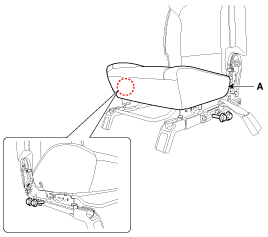
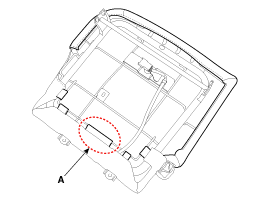
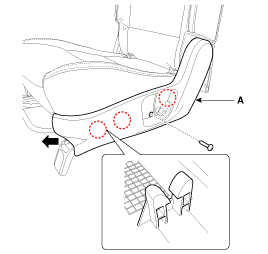
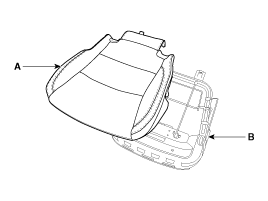
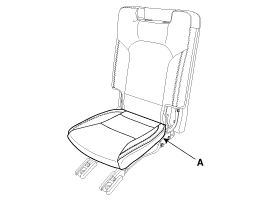
| 12. |
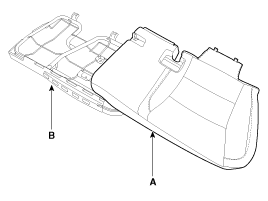
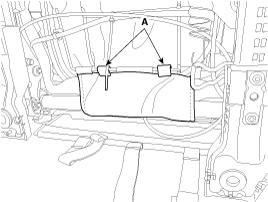
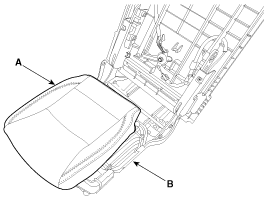
Remove the rear seat cushion cover (A) from the rear seat cushion frame.
|
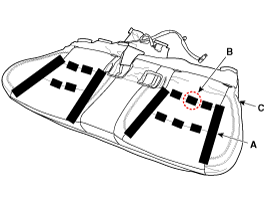
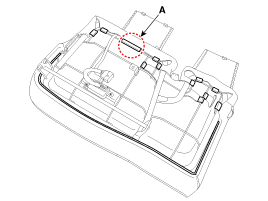
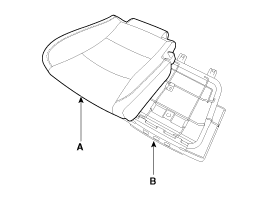
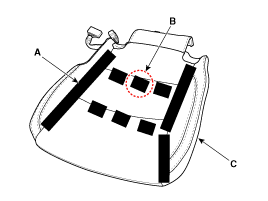
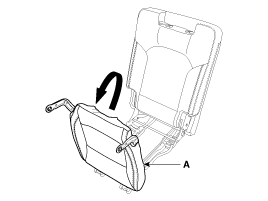
| 13. |
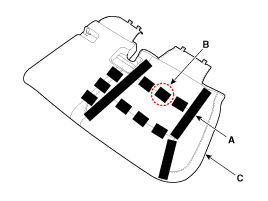
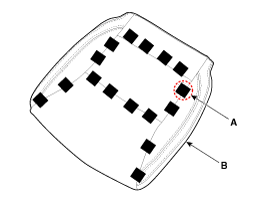
After removing the velcro tape (A) and hog-ring clips (B) on the rear
of seat cushion and remove the rear seat cushion cover (C).
|
| 14. |
Install in the reverse order of removal.
|

| (Except Europe and Australia) |
| [7-seat vehicle] |
| (LH) |
|
|
| 1. |
Remove the second row seat assembly [LH].
(Refer to Rear Seat - "Rear Seat Assembly")
|
| 2. |
Loosen the rear seat recliner lever mounting screw.
|
| 3. |
To remove the rear seat recliner lever (A), and then remove the rear
seat recliner lever after pushing the lock pin (B).
|
| 4. |
After loosening the mounting screw, then remove the rear seat shield
outer cover (A).
|
| 5. |
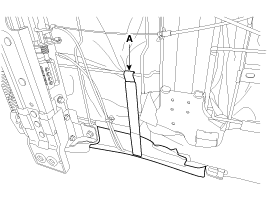
Remove the rear seat lower protector (A).
|
| 6. |
Remove the rear seat cushion mounting protector (A).
|
| 7. |
Disconnect the heater unit connector (A) and remove the rear seat cushion
frame mounting clips (B).
|
| 8. |
After loosening the mounting bolts, then remove the rear seat cushion
frame assembly (A).
[Front]
[Rear]
|

| 9. |
Pull out the hooks (A) by the rear seat cushion frame.
|
| 10. |
Remove the rear seat cushion cover (A) from the rear seat cushion frame
(B).
|
| 11. |
After removing the velcro tape (A) and hog-ring clips (B) on the rear
of seat cushion and remove the rear seat cushion cover (C).
|
| 12. |
Install in the reverse order of removal.
|
| (RH) |
|
|
| 1. |
Remove the second row seat assembly [RH].
(Refer to Rear Seat - "Rear Seat Assembly")
|
| 2. |
Loosen the rear seat recliner lever mounting screw.
|
| 3. |
To remove the rear seat recliner lever (A), and then remove the rear
seat recliner lever after pushing the lock pin (B).
|
| 4. |
After loosening the mounting screw, then remove the rear seat shield
outer cover (A).
|

| 5. |
After loosening the mounting bolt, then remove the second row seat belt
buckle [RH] (A).
|
| 6. |
After loosening the mounting screw, then remove the rear seat shield
inner cover (A).
|
| 7. |
Remove the rear seat lower protector (A).
|
| 8. |
Remove the rear seat cushion mounting protector (A).
|
| 9. |
After loosening the mounting bolts, then remove the rear seat cushion
frame assembly (A).
[Front]
[Rear]
|
| 10. |
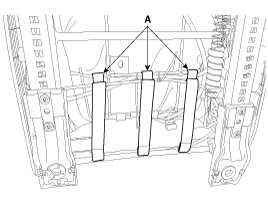
Remove the rear seat cushion frame mounting clips (A).
|
| 11. |
Pull out the hooks (A) by the rear seat cushion frame.
|
| 12. |
Remove the rear seat cushion cover (A) from the rear seat cushion frame
(B).
|
| 13. |
After removing the velcro tape (A) and hog-ring clips (B) on the rear
of seat cushion and remove the rear seat cushion cover (C).
|
| 14. |
Install in the reverse order of removal.
|
| (For Europe and Australia) |
| [5/7-seat vehicle] |
|
|
| 1. |
Remove the second row seat assembly.
(Refer to Rear Seat - "Rear Seat Assembly")
|
| 2. |
Loosen the rear seat recliner lever mounting screw.
|
| 3. |
To remove the rear seat recliner lever (A), and then remove the rear
seat recliner lever after pushing the lock pin (B).
|
| 4. |
After loosening the mounting screw, then remove the rear seat shield
outer cover (A).
|
| 5. |
After loosening the mounting screw, then remove the rear seat shield
inner cover (A).
|
| 6. |
Remove the rear seat lower protector (A).
|
| 7. |
Remove the rear seat cushion mounting protector (A).
|
| 8. |
Disconnect the heater unit connector (A) and remove the rear seat cushion
frame mounting clips (B).
|
| 9. |
After loosening the mounting bolts, then remove the rear seat cushion
frame assembly (A).
[Front]
[Rear]
|

| 10. |
Remove the seat belt buckle wiring mounting clips (A).
|
| 11. |
Pull out the hooks (A) by the rear seat cushion frame.
|
| 12. |
Remove the rear seat cushion cover (A) from the rear seat cushion frame
(B).
|
| 13. |
After removing the velcro tape (A) and hog-ring clips (B) on the rear
of seat cushion and remove the rear seat cushion cover (C).
|
| 14. |
Install in the reverse order of removal.
|
[Third row seat assembly]
|
|
| 1. |
Remove the third row seat assembly.
(Refer to Rear Seat - "Rear Seat Assembly")
|
| 2. |
Remove the rear seat side link cover (A).
[LH]
[RH]
|
| 3. |
Loosen the rear seat frame mounting bolts (A).
|
| 4. |
Push the rear seat cushion frame (A) to the front of the vehicle as
far as possible.
|
| 5. |
Pull out the hooks (A) by the rear seat cushion frame.
|
| 6. |
Remove the rear seat cushion cover (A) from the rear seat cushion frame
(B).
|
| 7. |
After removing the hog-ring clips (A) on the rear of seat cushion and
remove the rear seat cushion cover (B).
|
| 8. |
Install in the reverse order of removal.
|
 Rear Seat Cushion Cover Components and components location
Component Location
[Second row seat assembly]
(Except Europe and Australia)
[5-seat vehicle]
1. Rear seat cushion cover
...
 Rear Seat Folding Lever Components and components location
Component Location
[Second row seat assembly]
(Except Europe and Australia)
[5-seat vehicle]
1. Rear seat back webbing lever
...
Other information:
Kia Carens RP (2013-2018) Service Manual: Steering Column Shroud Panel Components and components location
Component Location 1. Steering column shroud lower panel 2. Steering column shroud upper panel ...
Kia Carens RP (2013-2018) Owners Manual: Power windows
The ignition switch must be in the ON position for power windows to operate. Each door has a power window switch that controls the door’s window. The driver’s door has a master power window switch that controls all the windows in the vehicle. Also, the driver has a power window lock switch wh ...
Copyright © www.kicaman.com 2015-2026
