Kia Carens: Front Suspension System / Front Lower Arm Repair procedures
Kia Carens RP (2013-2018) Service Manual / Suspension System / Front Suspension System / Front Lower Arm Repair procedures
| Replacement |
| 1. |
Loosen the wheel nuts slightly.
Raise the vehicle, and make sure it is securely supported.
|
| 2. |
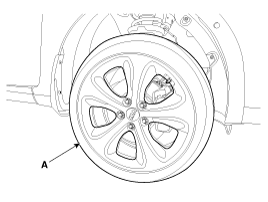
Remove the front wheel and tire (A) from front hub.
|

| 3. |
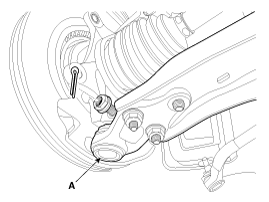
Loosen the bolt & nut and then remove the lower arm (A).
|
| 4. |
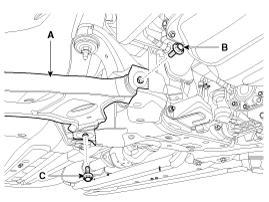
Loosen the bolts and nuts and then remove the front lower arm (A).
|
| 5. |
Installation is the reverse of removal.
|
| Inspection |
| 1. |
Check the bushing for wear and deterioration.
|
| 2. |
Check the front stabilizer bar for deformation.
|
| 3. |
Check the all bolts and nuts.
|
 Front Strut Assembly Repair procedures
Replacement
1.
Loosen the wheel nuts slightly.
Raise the vehicle, and make sure it is securely supported.
2.
Remove the front w ...
 Front Stabilizer Bar Repair procedures
Replacement
1.
Loosen the wheel nuts slightly.
Raise the vehicle, and make sure it is securely supported.
2.
Remove the front w ...
Other information:
Kia Carens RP (2013-2018) Service Manual: General information
Identification Numbers Identification Number Description Vehicle Identification Number 1. World Manufacturer Identifier (WMI) - KNA : Passenger vehicle, MPV(Multipurpose Passenger Vehicle)/SUV(Sports Utility Vehicle)/RV(Recreational Vehi ...
Kia Carens RP (2013-2018) Service Manual: Rear Glass Repair procedures
Removal • In order to remove the rear glass, use the tools shown in the following figure: [Tooling Diagram] ...
Copyright © www.kicaman.com 2015-2026
