Kia Carens: Front Suspension System / Front Stabilizer Bar Repair procedures
Kia Carens RP (2013-2018) Service Manual / Suspension System / Front Suspension System / Front Stabilizer Bar Repair procedures
| Replacement |
| 1. |
Loosen the wheel nuts slightly.
Raise the vehicle, and make sure it is securely supported.
|
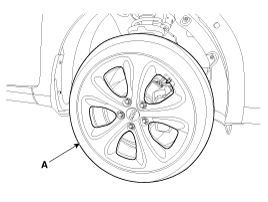
| 2. |
Remove the front wheel and tire (A) from front hub.
|

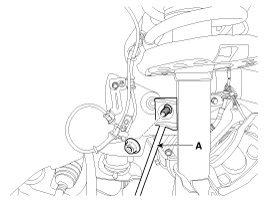
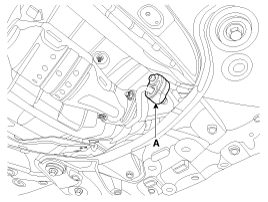
| 3. |
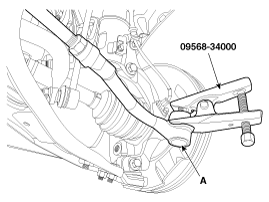
Disconnect the stabilizer link (A) from the front strut assembly after
loosening the nut.
|
| 4. |
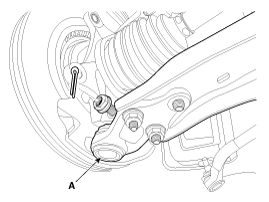
Remove the tie rod end ball joint (A) from the knuckle.
|
| 5. |
Loosen the bolt & nut and then remove the lower arm (A).
|
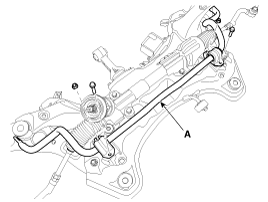
| 6. |
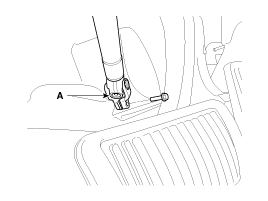
Loosen the bolt and then disconnect the universal joint assembly (A)
from the pinion of the steering gear box.
|
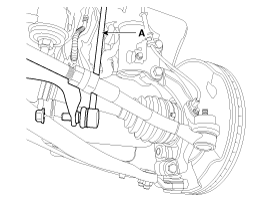
| 7. |
Loosen the bolt and then saperate the roll rod stopper (A).
|
| 8. |
Disconnect the muffler rubber hanger (A).
|
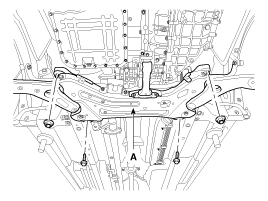
| 9. |
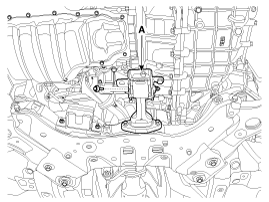
Loosen the bolts & nuts and then remove the sub frame (A).
|
| 10. |
Remove the stabilizer (A) from the front sub frame by loosening the
mounting bolts & nuts.
|
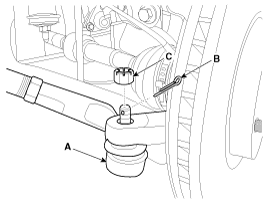
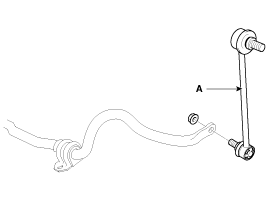
| 11. |
Loosen the nut and then remove the stabilizer link (A) from the stabilizer
bar.
|
| 12. |
Check the wheel Alignment.
(Refer to Tires/Wheels - "Alignment")
|
| Inspection |
| 1. |
Check the bushing for wear and deterioration.
|
| 2. |
Check the front stabilizer bar for deformation.
|
 Front Lower Arm Repair procedures
Replacement
1.
Loosen the wheel nuts slightly.
Raise the vehicle, and make sure it is securely supported.
2.
Remove the front w ...
 Front Stabilizer Link Repair procedures
Replacement
1.
Loosen the wheel nuts slightly.
Raise the vehicle, and make sure it is securely supported.
2.
Remove the front w ...
Other information:
Kia Carens RP (2013-2018) Service Manual: Repair procedures
Removal 1. Remove the air cleaner assembly and air duct. (Refer to Engine Mechanical System - "Air cleaner") 2. Remove the battery and battery tray. (Refer to Engine Electrical System - "Battery") ...
Kia Carens RP (2013-2018) Service Manual: Multimedia Jack Description and operation
Description The multimedia jack on the console upper cover is for customers who like to listen to external portable music players like the MP3, iPod and etc., through the vehicle's sound system when it is linked to this jack. The customer has this added option. In c ...
Copyright © www.kicaman.com 2015-2026
