
Kia Carens: Driveshaft Assembly / TJ Joint Repair procedures
Kia Carens RP (2013-2018) Service Manual / Driveshaft and axle / Driveshaft Assembly / TJ Joint Repair procedures
| Replacement |
|

| 1. |
Remove the Front Driveshaft.
(Refer to Driveshaft Assembly - “Front Driveshaft”)
|
| 2. |
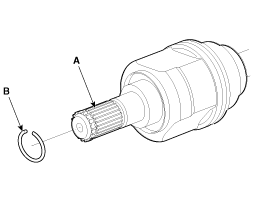
Remove the BJ circlip (B) from the TJ housing (A).
|
| 3. |
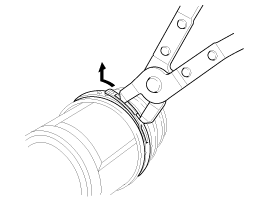
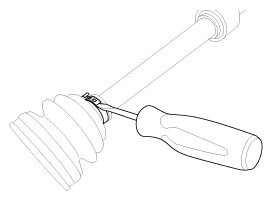
Remove both boot bands from the TJ housing.
|
| 4. |
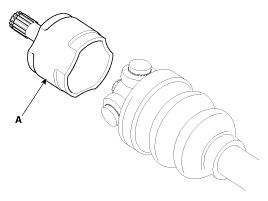
Remove the TJ circlip (A).
|
| 5. |
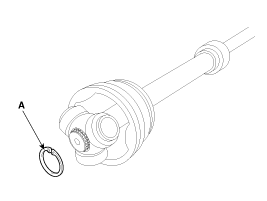
Remove the snap ring (A) from the shaft.
|
| 6. |
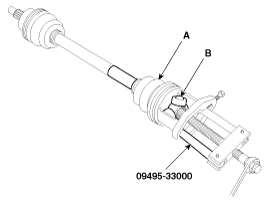
Remove the spider assembly (B) from the driveshaft (A) using the special
tool (09495-33000).
|
| 7. |
Clean the spider assembly.
|
| 8. |
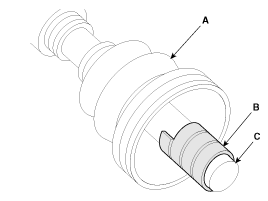
Remove the TJ boot (A).
|
| Inspection |
| 1. |
Check the spider assembly for roller rotation, wear or corrosion.
|
| 2. |
Check the groove inside the joint case for wear or corrosion
|
| 3. |
Check the TJ boots for damage and deterioration.
|
| Installation |
| 1. |
Wrap tape around the driveshaft spline(TJ) to prevent damage to the
boot.
|
| 2. |
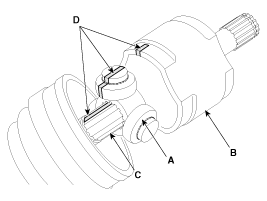
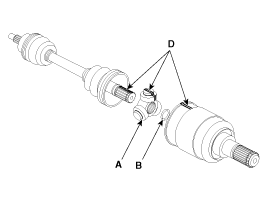
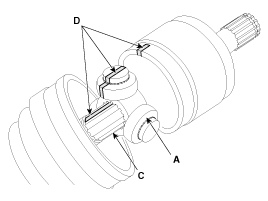
Using the alignment marks (D) made during disassembly as a guide, install
the spider assembly (A) and snap ring (B) on the driveshaft splines
(C).
|
| 3. |
Add specified grease to the joint boot as much as it was wiped away
at inspection.
|
| 4. |
Install the both boot band.
|
| 5. |
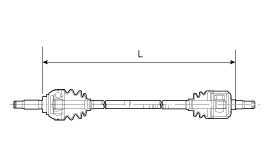
To control the air in the TJ boot, keep the specified distance between
the boot bands when they are tightened.
|
||||||||||||||||||||||||||||||||||
| 6. |
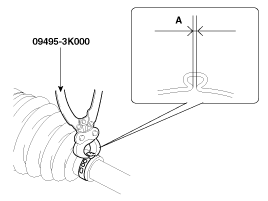
Using the SST(09495-3K000), secure the TJ boot bands.
|
| 7. |
Install the Front Driveshaft.
(Refer to Driveshaft Assembly - “Front Driveshaft”)
|
| 8. |
Check the front alignment.
(Refer to Suspension System - "Front Alignment")
|
 TJ Joint Components and components location
Components
[LH]
1. BJ assembly
2. BJ circlip
3. BJ boot band
4. BJ boot
5. Shaft
6. TJ boot band
7. TJ boot
8. Spider ...
 Dynamic Damper Components and components location
Components
1. BJ
assembly
2. BJ circlip
3. BJ boot band
4. BJ boot
5. Dynamic
damper band
6. Dynamic damper
7. Shaft
8. TJ boot ban ...
Other information:
Kia Carens RP (2013-2018) Service Manual: Front Wiper Motor Calibration Repair procedures
Wiper Setting Position Calibration Mode (Teach-In) ; If the assembled wiper arm is not lined up with the mark on the windshield, activate the opposite electronic motor wiper arm and set the blade setting position in teach-in mode to move the wiper arm to the correct position. 1 ...
Kia Carens RP (2013-2018) Service Manual: Troubleshooting
Troubleshooting Symptom Possible cause Remedy One lamp does not light (all exterior) Bulb burned out Replace bulb Socket, wiring or ground faulty Repair if necessary ...
Copyright © www.kicaman.com 2015-2026
