Kia Carens: Electric Power Steering / Steering Column and Shaft Repair procedures
Kia Carens RP (2013-2018) Service Manual / Steering System / Electric Power Steering / Steering Column and Shaft Repair procedures
| Replacement |
| 1. |
Disconnect the battery negative cable from the battery and then wait
for at least 30 seconds.
|
| 2. |
Turn the steering wheel so that the front wheels can face straight ahead.
|
| 3. |
Remove the airbag module.
(Refer to Restraint - "Driver Airbag (DAB) Module and Clock Spring")
|
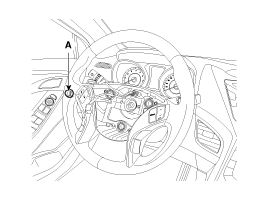
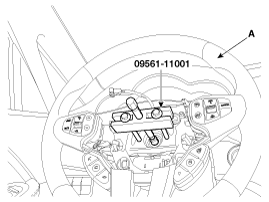
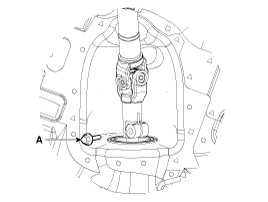
| 4. |
Disconnect the connector & lock nut (A) and then remove the steering
wheel by using special service tools (09561-11001).
|

| 5. |
Remove the crash pad lower panel.
(Refer to Body - "Crash Pad Lower Panel")
|
| 6. |
Remove the brake pedal. (RHD type)
(Refer to Brake System - "Brake Pedal")
|
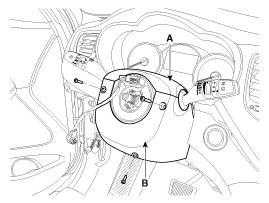
| 7. |
Loosen the screw and then remove the steering column upper (A) and lower
shroud (B).
|
| 8. |
Disconnect the connectors (A) and then remove the clock spring (B).
|
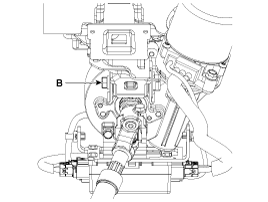
| 9. |
Disconnect the connector (A).
|

| 10. |
Loosen the screw and then remove the multifunction switches (A).
|

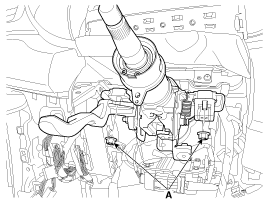
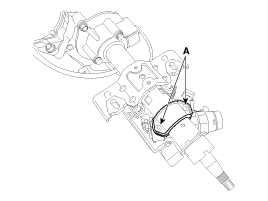
| 11. |
Loosen the bolt (A) and then disconnect the universal joint assembly
from the pinion of the steering gear box.
|
| 12. |
Disconnect all connectors connected to the steering column.
|
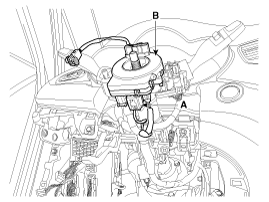
| 13. |
Remove the steering column & EPS unit assembly by loosening the mounting
bolt (B) and nuts (A).
|
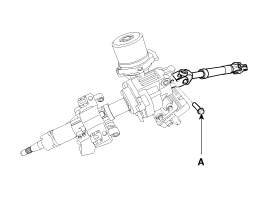
| 14. |
Loosen the bolt (A) and then disconnect the universal joint assembly
from the steering column assembly.
|
| 15. |
Reassembly is the reverse of the disassembly.
|
| Disassembly |
Key lock assembly
| 1. |
Make a groove on the head of special bolts (A) by a punch.
|
| 2. |
Loosen the special bolt using a screw driver and then remove the key
lock assembly from the steering column assembly.
|
| 3. |
Reassembly is the reverse of the disassembly.
|
| Inspection |
| 1. |
Check the steering column for damage and deformation.
|
| 2. |
Check the joint bearing for damage and wear.
|
| 3. |
Check the tilt bracket for damage and cracks.
|
| 4. |
Check the key lock assembly for proper operation and replace it if necessary.
|
 Repair procedures
General Inspection
After or before servicing the EPS system, perform the troubleshooting and test
procedure as follows. Compare the system condition with normal condition in
the ...
 Steering Gear box Components and components location
Components
1. Tie rod end
2. Lock nut
3. Bellows
4. Bellows band
5. Tie rod
6. Rack bar
7. Dust packing
8. Dust cap
9. Oil sea ...
Other information:
Kia Carens RP (2013-2018) Service Manual: Rear Transverse Trim Components and components location
Component Location 1. Rear transverse trim ...
Kia Carens RP (2013-2018) Service Manual: Center Fascia Panel Components and components location
Component Location 1. Center fascia panel ...
Copyright © www.kicaman.com 2015-2026
