Kia Carens: Automatic Transaxle / Repair procedures
Kia Carens RP (2013-2018) Service Manual / Automatic Transaxle System / Automatic Transaxle / Repair procedures
| Removal |
| 1. |
Remove the air cleaner assembly and air duct.
(Refer to Engine Mechanical System - "Air cleaner")
|
| 2. |
Remove the battery and battery tray.
(Refer to Engine Electrical System - "Battery")
|
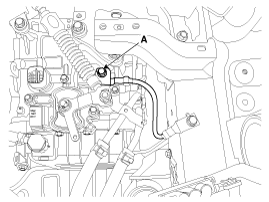
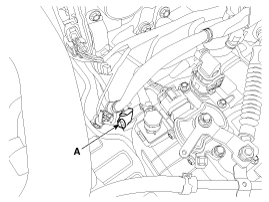
| 3. |
Remove the ground line after removing the bolt (A).
|
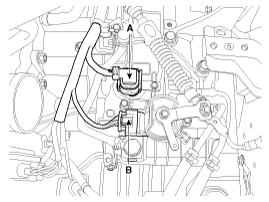
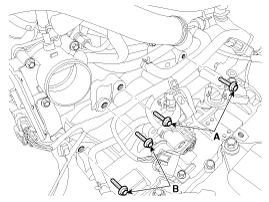
| 4. |
Dissconnect the solenoid valve connector (A) and inhibitor switch connector
(B).
|
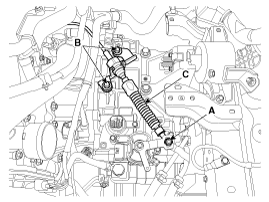
| 5. |
Remove the control cable (C) after removing the nut (A) and the bolt
(B).
|
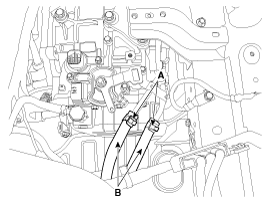
| 6. |
Disconnect the hose (B) after removing the automatic transaxle fluid
cooler hose clamp (A).
|
| 7. |
Remove the wiring mounting bolt (A).
|
| 8. |
Remove the solenoid valve connector and inhibitor switch connector wiring
mounting bracket (A)and(B).
|

| 9. |
Remove the cowl top cover.
(Refer to Body - "Cowl Top Cover")
|
| 10. |
Disconnect the wiper motor connector (A).
|
| 11. |
Remove the cowl top panel (B).
|
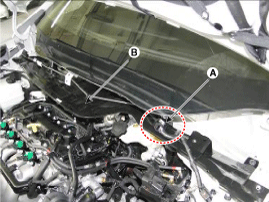
| 12. |
Remove the automatic transaxle upper mounting bolt (A-2ea) and the starter
motor mounting bolt (B-2ea).
|
| 13. |
Assembly the engine support fixture.
(Refer to Special Service Tools - "Engine support fixture assembly drawing")
|
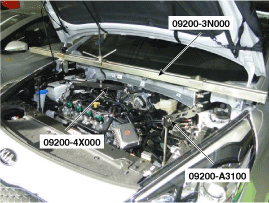
| 14. |
Using the engine support fixture (Beam No. : 09200-3N000, Support :
09200-A3100, Adapter : 09200-4X000), hold the engine and transaxle safely.
|
| 15. |
Remove the front tires.
(Refer to Suspension System - "Tire")
|
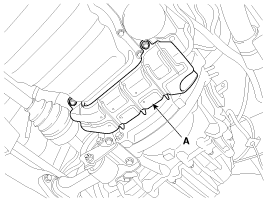
| 16. |
Remove the mounting cover (A).
|
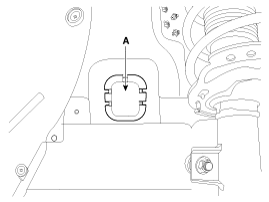
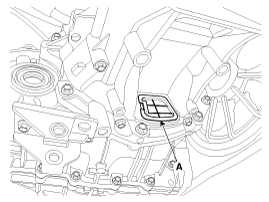
| 17. |
Remove the automatic transaxle mounting bracket bolts (A).
|
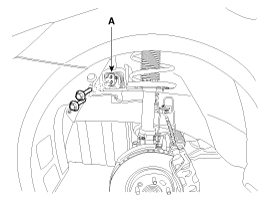
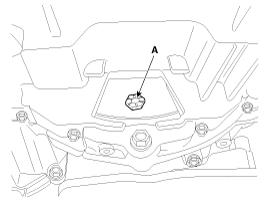
| 18. |
Remove the automatic transaxle support bracket (A).
|
| 19. |
Lift the vehicle with a jack.
|
| 20. |
Remove the under cover and side under cover.
(Refer to Engine Mechanical System - "Engine Room Under Cover")
|
| 21. |
Remove the drive shaft assembly.
(Refer to Driveshaft and Axle - "Front Driveshaft")
|
| 22. |
Remove the heat protector (A).
|
| 23. |
Remove the air guide bracket (A).
|
| 24. |
Remove the dust cover (A).
|
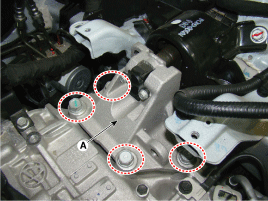
| 25. |
Remove the torque converter mounting bolts (A) by rotating the crankshaft.
|
| 26. |
Remove the roll stopper (A).
|
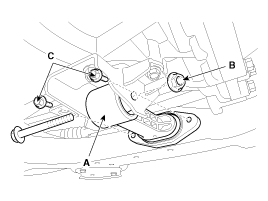
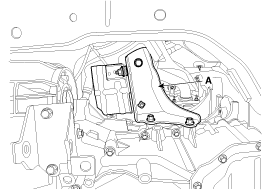
| 27. |
Remove the mounting bolt (A, B) after supporting the transaxle on a
jack.
|

| 28. |
Remove the transaxle while slowly lower the jack.
|

| Installation |
| 1. |
Install in the reverse order of removal
|
 Components and components location
Components Location
1. Converter
housing
2. Automatic transaxle upper mounting bolt
3. Shift cable bracket
4. Manual control lever
5. Rear cover
6. ...
 Hydraulic System
...
Other information:
Kia Carens RP (2013-2018) Service Manual: Repair procedures
Brake Booster Operating Test For simple checking of the brake booster operation, carry out the following tests. 1. Run the engine for one or two minutes, and then stop it. If the pedal depresses fully the first time but gradually becomes higher when ...
Kia Carens RP (2013-2018) Service Manual: Rear Console Cover Repair procedures
Replacement • Put on gloves to protect your hands. • When ...
Copyright © www.kicaman.com 2015-2026
