Kia Carens: Rear Seat / Rear Seat Assembly Repair procedures
Kia Carens RP (2013-2018) Service Manual / Body (Interior and Exterior) / Rear Seat / Rear Seat Assembly Repair procedures
| Replacement |
[Second row seat assembly]
(Except Europe and Australia)
[5-seat vehicle]
| 1. |
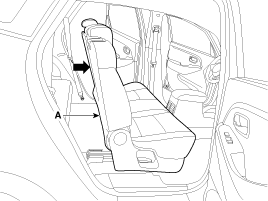
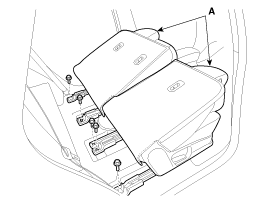
Push the second row seat assembly (A) towards the front of the vehicle
as far as possible.
|
| 2. |
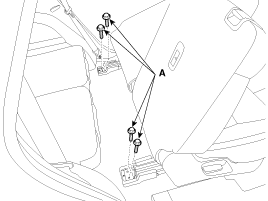
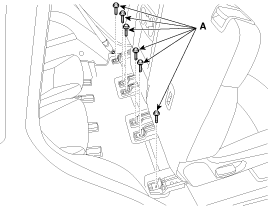
Loosen the second row seat assembly rear mounting bolts (A).
|
| 3. |
Push the second row seat assembly towards the rear of the vehicle as
far as possible.
|
| 4. |
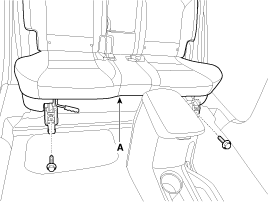
After loosening the mounting bolts, then remove the second row seat
assembly (A).
|
| 5. |
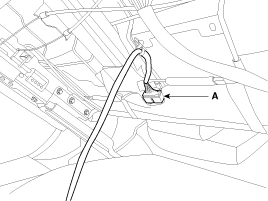
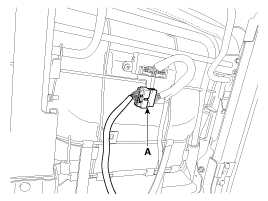
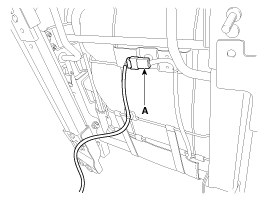
Disconnect the heater connector (A).
|
| 6. |
Install in the reverse order of removal.
|
(Except Europe and Australia)
[7-seat vehicle]
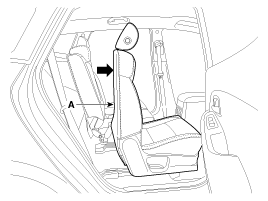
| 1. |
Push the second row seat assembly [RH] (A) towards the front of the
vehicle as far as possible.
|
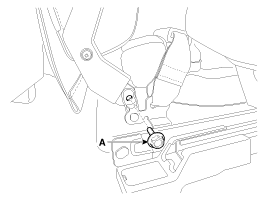
| 2. |
Loosen the second center seat belt buckle mounting bolt (A).
|
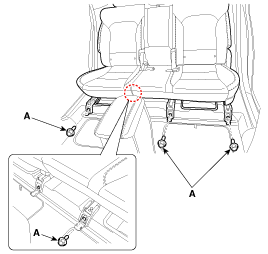
| 3. |
Loosen the second row seat assembly front mounting bolts (A).
|
| 4. |
Push the second row seat assembly (A) towards the front of the vehicle
as far as possible.
|
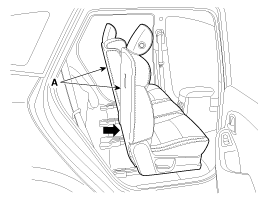
| 5. |
After loosening the mounting bolts, then remove the second row seat
assembly (A).
|
| 6. |
Disconnect the heater connector (A).
[LH]
[RH]
|
| 7. |
Install in the reverse order of removal.
|
(For Europe and Australia)
[5/7-seat vehicle]
| 1. |
Push the second row seat assembly towards the front of the vehicle as
far as possible.
|
| 2. |
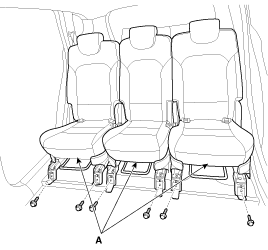
Loosen the second row seat assembly rear mounting bolts (A).
|
| 3. |
Push the second row seat assembly towards the rear of the vehicle as
far as possible.
|
| 4. |
After loosening the mounting bolts, then remove the second row seat
assembly (A).
|
| 5. |
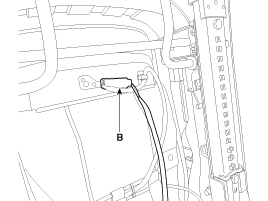
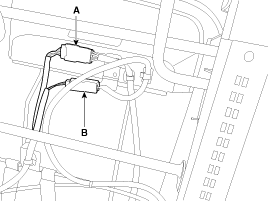
Disconnect the heater connector (A) and seat belt buckle connector (B).
[LH, RH]
[Center]
|
| 6. |
Install in the reverse order of removal.
|
[Third row seat assembly]
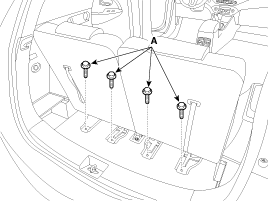
| 1. |
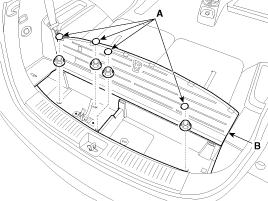
Remove the luggage box hole cap (A).
|
| 2. |
After loosening the mounting nuts, then remove the luggage rear tray
(B).
|
| 3. |
Loosen the third row seat assembly rear mounting bolts (A).
|
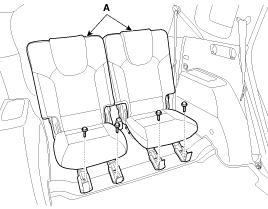
| 4. |
After loosening the mounting bolts, then remove the third row seat assembly
(A).
|
| 5. |
Install in the reverse order of removal.
|
 Rear Seat Assembly Components and components location
Component Location
[Second row seat assembly]
(Except Europe and Australia)
[5-seat vehicle]
1. Second row seat assembly
...
 Rear Seat Back Cover Components and components location
Component Location
[Second row seat assembly]
(Except Europe and Australia)
[5-seat vehicle]
1. Rear seat back cover [LH]
...
Other information:
Kia Carens RP (2013-2018) Service Manual: Antenna Repair procedures
Inspection Antenna Cable 1. Remove the antenna jack from the audio unit and antenna. 2. Check for continuity between the center poles of antenna cable. 3. Check for continuity between the ou ...
Kia Carens RP (2013-2018) Service Manual: Special service tools
Special Service Tools Tool(Number and Name) Illustration Use 09495-3K000 Band installer Installation of ear type boot band 09495-33000 Puller Remov ...
Copyright © www.kicaman.com 2015-2026


