No.
|
Description
|
Input/ Output
|
Communication
|
Value (V)
|
Specified conditions
|
A1
|
IGN1
|
Input
|
Hardwire
|
9 ~ 16
|
IGN switch ON
|
A2
|
DC 12V input (ISG only)
|
Input
|
Hardwire
|
|
IGN Switch ON
|
A3
|
M/T 'R' input
|
Input
|
Hardwire
|
9 ~ 16
|
IGN switch ON
|
A4
|
Heated steering wheel
|
Input
|
Hardwire
|
5 ~
|
Heated steering wheel switch ON
|
A5
|
-
|
|
|
|
|
A6
|
Low washer
|
Input
|
Hardwire
|
~ 2.7
|
IGN ON & warning lamp turn ON
|
A7
|
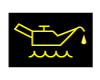
Oil pressure
|
Input
|
Hardwire
|
~ 2.7
|
IGN switch ON, warning lamp ON
|
A8
|
Battery charge
|
Input
|
Hardwire
|
~ 1.5
|
IGN switch ON, charge switch ON
|
A9
|
Active ECO
|
Input
|
Hardwire
|
~ 2.7
|
IGN switch ON, ACTIVE ECO switch ON, warning lamp ON
|
A10
|
Immobilizer
|
Input
|
Hardwire
|
~ 1
|
IGN switch ON, warning lamp ON
|
A11
|
Switch GND
|
Input
|
Hardwire
|
~ 1
|
Always
|
A12
|
-
|
|
|
|
|
A13
|
Rheostat up switch
|
Input
|
Hardwire
|
~ 2.7
|
IGN switch ON, Illumination UP
|
A14
|
Rheostat down switch
|
Input
|
Hardwire
|
~ 2.7
|
IGN switch ON, Illumination DOWN
|
A15
|
-
|
|
|
|
|
A16
|
Water separator sensor
|
Input
|
Hardwire
|
~ 2.7
|
IGN switch ON, Warning lamp turn OFF
|
A17
|
D output
|
Output
|
Hardwire
|
6 ~ 15
|
IGN ON & shift the lever in D
|
A18
|
S output
|
Output
|
Hardwire
|
6 ~ 15
|
IGN ON & shift the lever in S
|
A19
|
4P_OUT
|
Output
|
Hardwire
|
~ 1.2
|
IGN switch ON, vehicle speed over 1KM/H
|
A20
|
Detent output
|
Output
|
Hardwire
|
6 ~ 15
|
IGN ON & rheostat up to max position
|
A21
|
Battery
|
Input
|
Hardwire
|
9 ~ 16
|
Always
|
A22
|
ILL+
|
Input
|
Hardwire
|
9 ~ 16
|
Tail lamp switch ON
|
A23
|
Airbag
|
Input
|
CAN
|
-
|
|
A24
|
-
|
|
|
|
|
A25
|
Signal GND
|
Input
|
Hardwire
|
~1
|
Always
|
A26
|
Speed input (-) (M/T)
|
Input
|
Hardwire
|
|
IGN Switch ON
|
A27
|
C CAN high
|
Input
|
CAN
|
-
|
|
A28
|
C CAN low
|
Input
|
CAN
|
-
|
|
A29
|
MM CAN high
|
Input
|
CAN
|
-
|
|
A30
|
MM CAN low
|
Input
|
CAN
|
-
|
|
A31
|
Fuel GND
|
Input
|
Hardwire
|
~ 1
|
Always
|
A32
|
Fuel
|
Input
|
Hardwire
|
~ 1.3
|
Gauge is FULL
|
7.68 ~
|
Gauge is EMPTY
|
A33
|
Trip switch 1
|
Input
|
Hardwire
|
Trip switch input power
|
IGN switch ON &
control the trip switch
|
A34
|
Trip switch 2
|
Input
|
Hardwire
|
Trip switch input power
|
IGN switch ON &
control the trip switch
|
A35
|
-
|
|
|
|
|
A36
|
N output
|
Output
|
Hardwire
|
6 ~ 15
|
IGN ON & shift the lever in N
|
A37
|
R output
|
Output
|
Hardwire
|
6 ~ 15
|
IGN ON & shift the lever in R
|
A38
|
P output
|
Output
|
Hardwire
|
6 ~ 15
|
IGN ON & shift the lever in P
|
A39
|
ALT L output (ISG only)
|
Input
|
Hardwire
|
~ 2.7
|
IGN switch ON, warning lamp ON
|
A40
|
Illumination GND
|
Input
|
Hardwire
|
~ 1
|
Always
|