Kia Carens: Automatic Transaxle Control System / Input Speed Sensor Repair procedures
Kia Carens RP (2013-2018) Service Manual / Automatic Transaxle System / Automatic Transaxle Control System / Input Speed Sensor Repair procedures
| Inspection |
| 1. |
Turn ignition switch OFF.
|
| 2. |
Remove the air cleaner assembly.
(Refer to Engine Mechanical System - "Air cleaner")
|
| 3. |
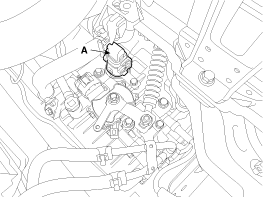
Disconnect the solenoid valve connector (A).
|
| 4. |
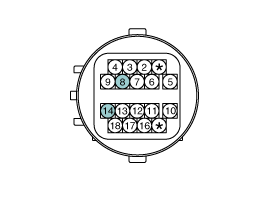
Measure the resistance between power terminal (14) and signal terminal
(8).
|
| Removal |
| 1. |
Remove the valve body assembly.
(Refer to Hydraulic System - "Valve Body")
|
| 2. |
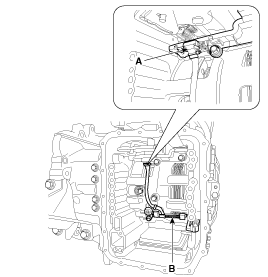
Disconnect the input & output speed sensor connector (A).
|
| 3. |
Remove the input & output speed sensor (B) after loosening the bolts.
|
| Installation |
| 1. |
Install in the reverse order of removal.
|
 Input Speed Sensor Troubleshooting
Signal Waveform
Fig 1) Input/Output speed sensor at low speed
Fig 2) Input/Output speed sensor at high speed ...
 Output Speed Sensor Description and operation
Description
•
Output speed sensor uses an electric current type hall sensor in which
the current is changed by the magnetic variation.
•
...
Other information:
Kia Carens RP (2013-2018) Owners Manual: START/RUN
With manual transaxle To start the engine, depress the clutch pedal and brake pedal, then press the engine start/stop button with the shift lever in the N (Neutral) position. With automatic transaxle / Dual clutch transmission To start the engine, depress the brake pedal and press the engine start ...
Kia Carens RP (2013-2018) Service Manual: Crankshaft Position Sensor (CKPS) Specifications
Specification Item Specification Coil Resistance (Ω) 774 ~ 946 [20°C (68°F)] ...
Copyright © www.kicaman.com 2015-2026


