Kia Carens: Hood / Hood Latch Repair procedures
Kia Carens RP (2013-2018) Service Manual / Body (Interior and Exterior) / Hood / Hood Latch Repair procedures
| Replacement |
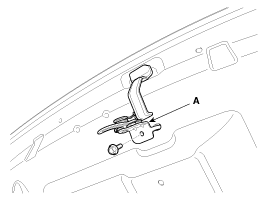
[Hood upper latch assembly]
| 1. |
After loosening the mounting bolt, then remove the hood upper latch
assembly (A).
|
| 2. |
Install in the reverse order of removal.
|

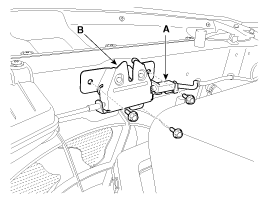
[Hood lower latch assembly]
| 1. |
Disconnect the hood lower latch connector (A).
|
| 2. |
Remove the hood lower latch assembly (B) mounting bolts.
|
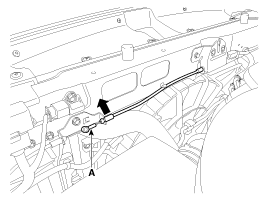
| 3. |
Disconnect the hood latch release handle cable (A).
|
| 4. |
Install in the reverse order of removal.
|
 Hood Latch Components and components location
Component Location
1. Hood upper latch assembly
2. Hood lower latch assembly
...
 Tail Gate
...
Other information:
Kia Carens RP (2013-2018) Service Manual: Injector Repair procedures
Inspection 1. Turn the ignition switch OFF. 2. Disconnect the injector connector. 3. Measure resistance between the injector terminals 1 and 2. 4. Check that the resistance i ...
Kia Carens RP (2013-2018) Owners Manual: Display
If the system doesn’t have a reliable speed limit information, the following symbol is displayed in both the instrument cluster and navigation screen. If the system detect no passing sign, no passing is displayed in both the instrument cluster and navigation screen. After passing "e ...
Copyright © www.kicaman.com 2015-2026
