Kia Carens: Hands Free System / Hands Free Switch Repair procedures
Kia Carens RP (2013-2018) Service Manual / Body Electrical System / Hands Free System / Hands Free Switch Repair procedures
| Inspection |
| 1. |
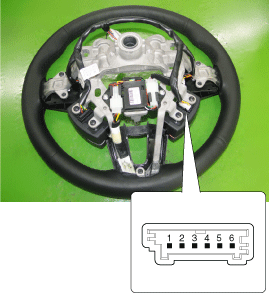
Check for resistance between terminals in each switch position.
[Bluetooth + Voice]
|
| Removal |
| 1. |
Disconnect the negative (-) battery terminal.
|
| 2. |
Remove the driver airbag module.
(Refer to Restraint - "Driver Airbag (DAB) Module and Clock Spring")
|
| 3. |
Remove the steering wheel.
(Refer to Steering System - "Steering Column and Shaft")
|
| 4. |
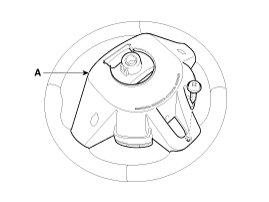
Remove the steering wheel cover (A) after loosening the screws.
|
| 5. |
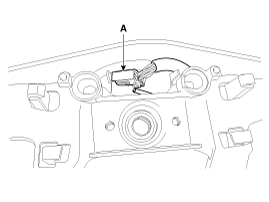
Disconnect the heated steering connector (A).
|
| 6. |
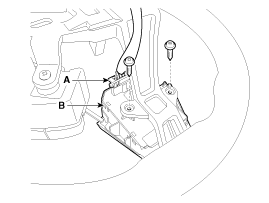
Remove the upper remote control switch (B) after loosening the screws
and connector (A).
|
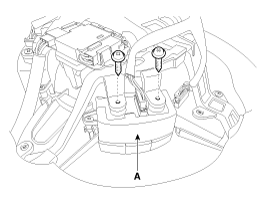
| 7. |
Remove the lower remote control switch (A) after loosening the screws
and connector (B).
|
| Installation |
| 1. |
Install the remote control switch on the steering wheel.
|
| 2. |
Install the steering wheel.
|
| 3. |
Reconnect the remote control switch connector and airbag connectors.
|
| 4. |
Install the driver airbag module.
|
| 5. |
Connect the negative (-) battery terminal.
|
 Hands Free Switch Schematic diagrams
Circuit Diagram
...
 Hands Free Mic Repair procedures
Inspection
1.
Disconnect the negative (-) battery terminal.
2.
Remove the handsfree mic (B) after disconnecting the handsfree mic connec ...
Other information:
Kia Carens RP (2013-2018) Service Manual: Schematic diagrams
Schematic Diagram 1. CAN 2. MIL lamp 3. Immobilizer 4. Canister 5. Purge control solenoid valve 6. Manifold absolute pressure sensor 7. Throttle position sensor (ETC module included) 8. ETC motor 9. Injector 10. Knock sensor 11. Ig ...
Kia Carens RP (2013-2018) Service Manual: Specifications
Specification Ignition System Ignition Coil Item Specification Primary Coil Resistance (Ω) 0.79 ± 15% [20°C (68°F)] Secondary Coil Resistance (kΩ) 5.9 ± 15% [20°C (68° ...
Copyright © www.kicaman.com 2015-2026


