Kia Carens: Cooling System / Cooling Fan Repair procedures
Kia Carens RP (2013-2018) Service Manual / Engine Mechanical System / Cooling System / Cooling Fan Repair procedures
| Removal and Installation |
Cooling fan assembly
| 1. |
Remove the engine room under cover.
(Refer to Engine And Transaxle Assembly - “Engine Room Under Cover”)
|
| 2. |
Disconnect the battery negative terminal.
|
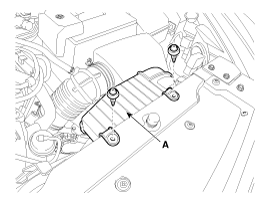
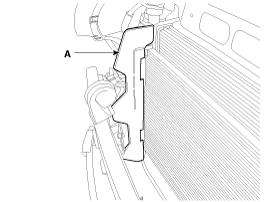
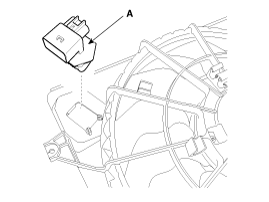
| 3. |
Remove the air duct (A).
|
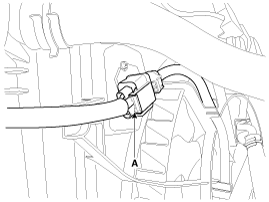
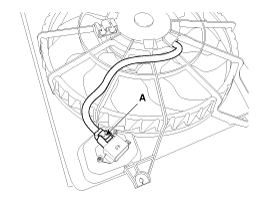
| 4. |
Disconnect the cooling fan connector (A).
|
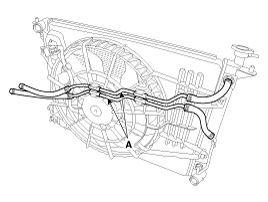
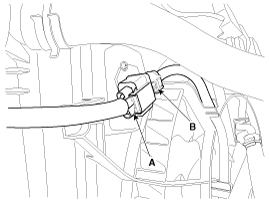
| 5. |
Disconnect the automatic transaxle fluid cooler hoses & pipes (A) from
the cooling fan. [A/T type only]
|
| 6. |
Remove the front bumper cover.
(Refer to Body - "Front Bumper Cover")
|
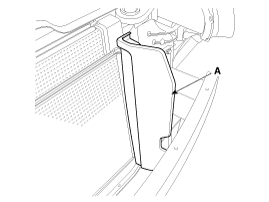
| 7. |
Remove the intake shield (A).
|
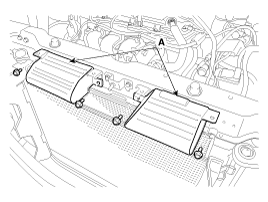
| 8. |
Remove the side air guards (A).
[RH]
[LH]
|
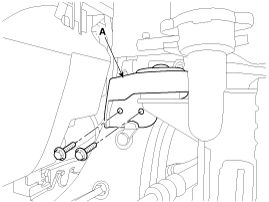
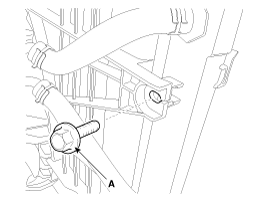
| 9. |
Remove the radiator upper mounting brackets (A).
[RH]
[LH]
|
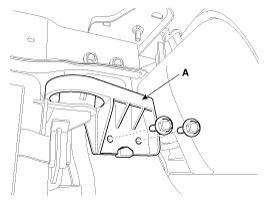
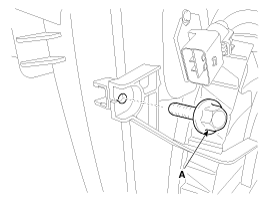
| 10. |
Remove the cooling fan assembly mounting bolts (A).
[RH]
[LH]
|
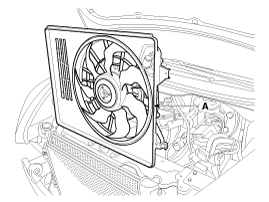
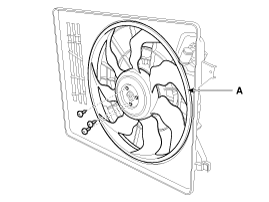
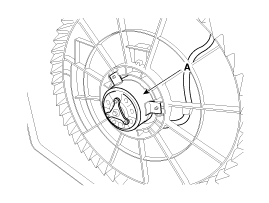
| 11. |
Remove the cooling fan (A).
|
Resistor
| 1. |
Disconnect the wire harness connector (A) and the fan motor connector
(B).
|
| 2. |
Remove the resistor (A) from the cooling fan shroud.
|
| 3. |
Install in the reverse order of removal.
|
| Disassembly |
| 1. |
Remove the cooling fan (A) from the cooling fan assembly.
|
| 2. |
Disconnect the fan motor connector (A) from the resistor.
|
| 3. |
Remove the fan motor (A) from the cooling fan shroud.
|
| 4. |
Assemble in the reverse order of disassembly.
|
| Inspection |
| Fan Motor |
| 1. |
Disconnect the fan motor connector from the resistor.
|
| 2. |
Connect the battery voltage to the "+" terminal and ground to "-" terminal.
|
| 3. |
Check the cooling fan motor operates well.
|
 Cooling Fan Schematic diagrams
Circuit Diagram
...
 Radiator Components and components location
Components
1.
Reservoir tank
2. Overflow hose
3. Radiator upper bracket (RH)
4. Radiator upper bracket (LH)
5.
Mo ...
Other information:
Kia Carens RP (2013-2018) Service Manual: Injector Troubleshooting
Signal Waveform The three waveforms below are taken from the #1 and #4 injectors. The top waveform is from the high side (feed side) of the #1 and #4 injectors, while the middle waveform is from the low side (ground side) of the #1 injector and the bottom waveform is from th ...
Kia Carens RP (2013-2018) Service Manual: Repair procedures
On-vehicle Inspection Inspect ignition coil assembly and Perform spark test 1. Check for DTCs. • If a D ...
Copyright © www.kicaman.com 2015-2026
