Kia Carens: Tire Pressure Monitoring System / TPMS Receiver Repair procedures
Kia Carens RP (2013-2018) Service Manual / Suspension System / Tire Pressure Monitoring System / TPMS Receiver Repair procedures
| Replacement |
When the receiver first arrives for replacement:
|

It is important to make sure that the correct receiver is used to replace
the faulty part i.e. it must be Low Line and not High Line in order
to have the correct inflation warning thresholds set.
|

| 1. |
Disconnect the negative (-) battery cable.
|
| 2. |
Remove the bracket and receiver (A) as loosen the nut.
|
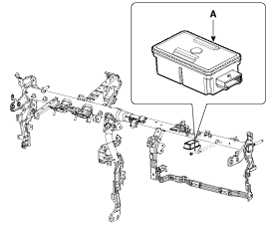
| 3. |
Install in the reverse order of removal.
|
| 4. |
Re-connect battery and turn Ignition on.
|
| 5. |
After replacing the receiver, learn by using self-diagnosis device(GDS).
|
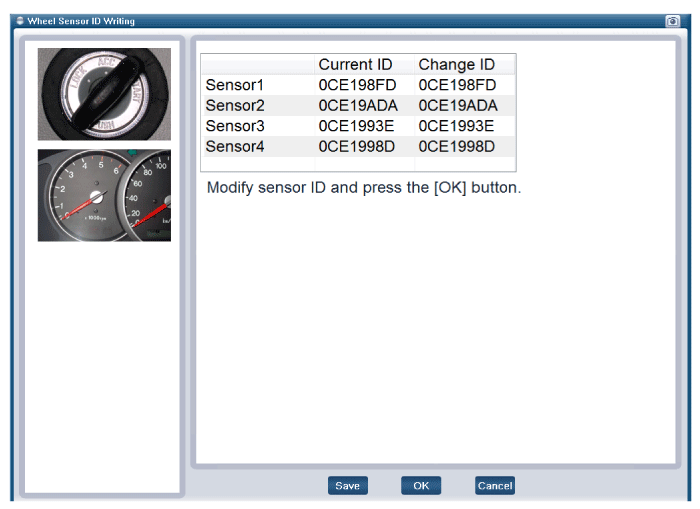
[Wheel Sensor ID Writing (Wireless) initialization]
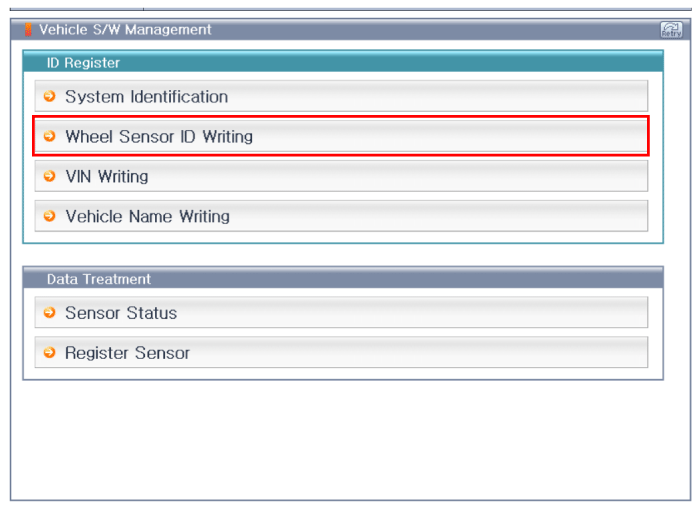
[Wheel Sensor ID Writing (Wireless) 1]
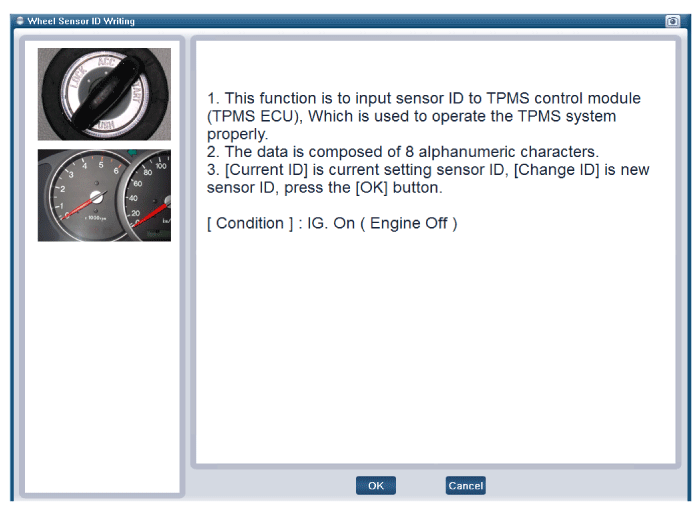
[Wheel Sensor ID Writing (Wireless) 2]
| Diagnosis procedure by using diagnostic device |
As manual for diagnosis methods by using diagnosis device, the main contents
are as follows:
| 1. |
Connect self-diagnosis connector(16pins) located in the lower of driver
side crash pad to self-diagnosis device, and then turn the self-diagnosis
device after key is ON.
|
| 2. |
Select the "vehicle model" and "TPMS" on GDS vehicle selection screen,
then select OK.
|
[Vehicle name input initialization]
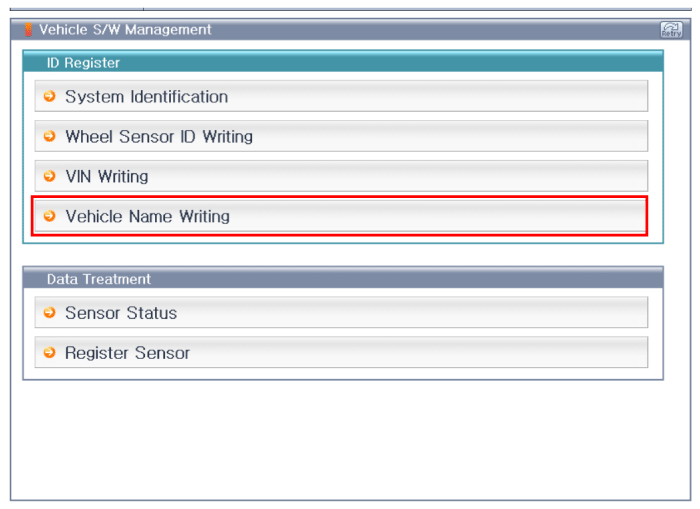
[Vehicle Name Writing 1]
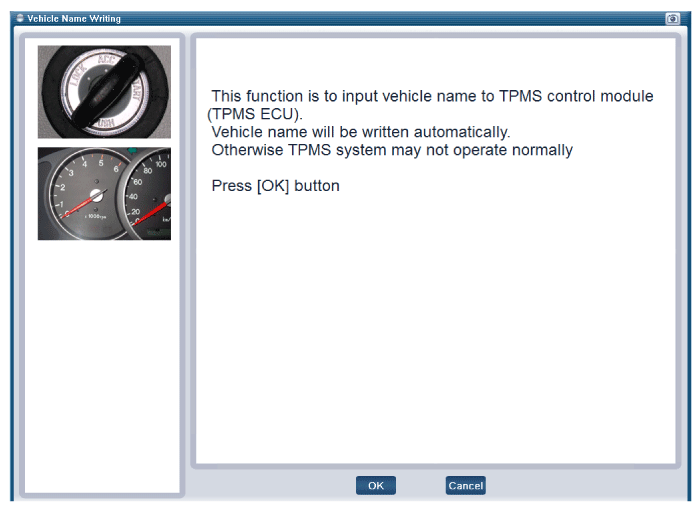
[Vehicle Name Writing 2]
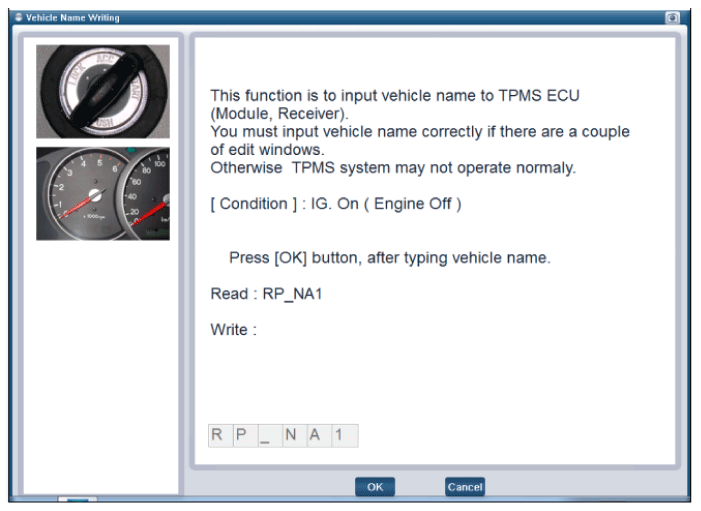
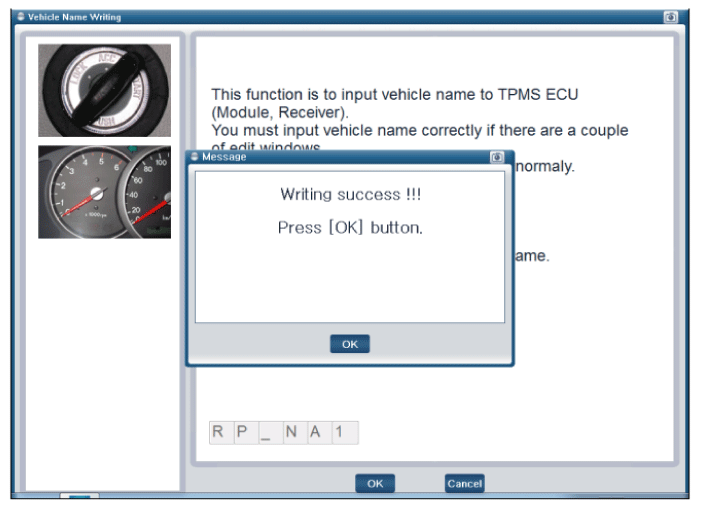
|
[Vehicle Name Writing 3]
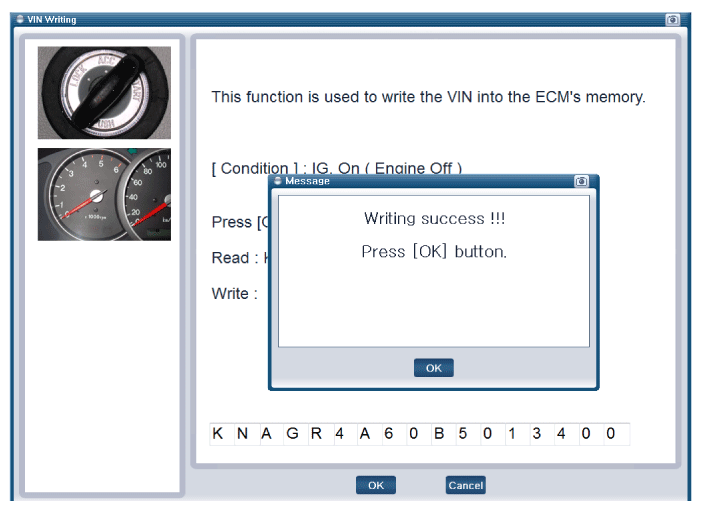
[VIN input initialization]
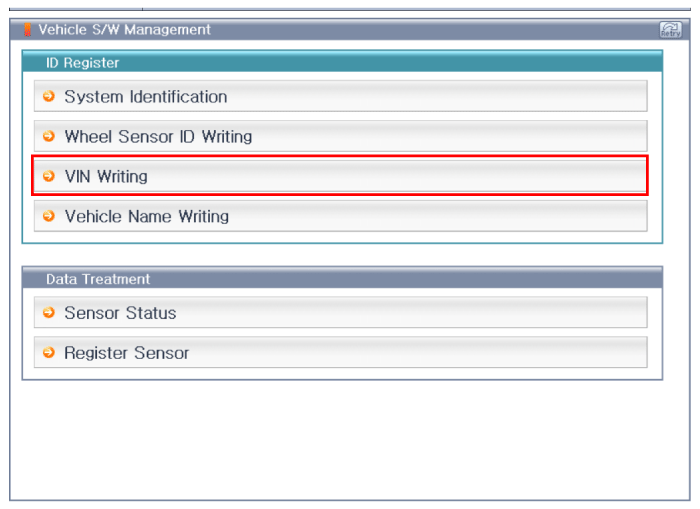
[VIN Writing 1]
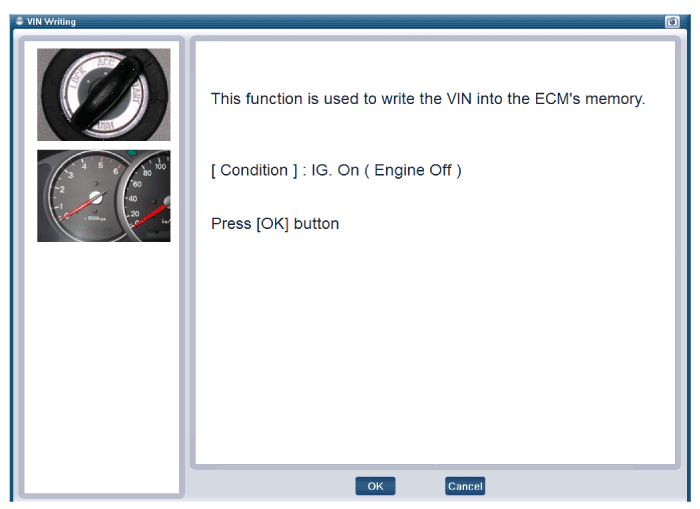
[VIN Writing 2]
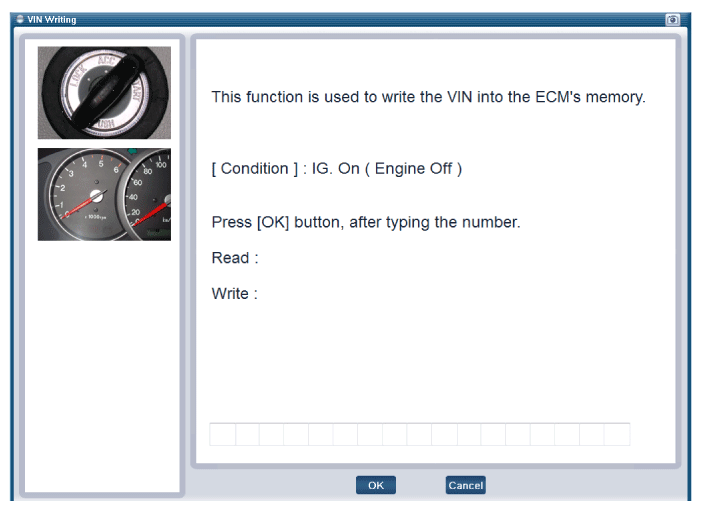
[VIN Writing 3]
 TPMS Receiver Description and operation
Description
1.
Mode
(1)
Virgin State
•
The receiver as a sole part is ship ...
 Steering System
...
Other information:
Kia Carens RP (2013-2018) Service Manual: Front Strut Assembly Repair procedures
Replacement 1. Loosen the wheel nuts slightly. Raise the vehicle, and make sure it is securely supported. 2. Remove the front wheel and tire (A) from front hub. Tightening torque: 88.2 ~ ...
Kia Carens RP (2013-2018) Owners Manual: Manual heating and air conditioning
The heating and cooling system can be controlled manually by pressing buttons or turning knob(s) other than the AUTO button. In this case, the system works sequentially according to the order of buttons or knob(s) selected. 1.Start the engine. 2.Set the mode to the desired position. To improve the ...
Copyright © www.kicaman.com 2015-2026
