Kia Carens: Intake And Exhaust System / Muffler Repair procedures
Kia Carens RP (2013-2018) Service Manual / Engine Mechanical System / Intake And Exhaust System / Muffler Repair procedures
| Removal and Installation |
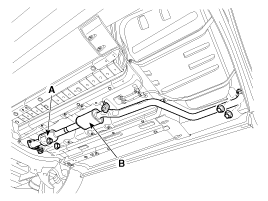
Front Muffler
| 1. |
Disconnect the rear oxygen sensor connector (A).
|
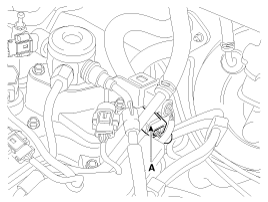
| 2. |
Remove the front muffler (A).
|
| 3. |
Install in the reverse order of removal.
|

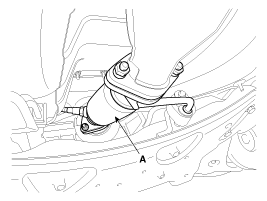
Center Muffler
| 1. |
Remove the center muffler assembly (A).
|
| 2. |
Install in the reverse order of removal.
|
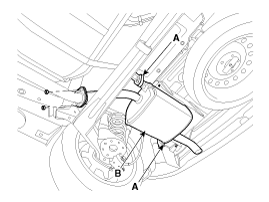
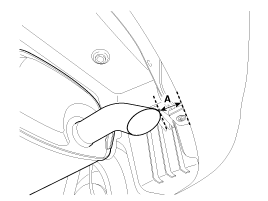
Main muffler
| 1. |
Detach the rubber hangers (A) from the rear muffler.
|
| 2. |
Remove the rear muffler (B).
|
| 3. |
Install in the reverse order of removal.
|
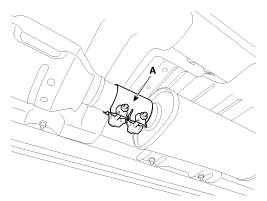
Replacement procedure of center muffler using clamp
Under warranty : Replace the center muffler assembly.
Out of warranty : It is available to replace the center muffler as the procedure
below.
| 1. |
Check that the clamping part of the center muffler assembly is damaged
or deformed.
If the muffler is too corroded to clamp, replace the center muffler
assembly.
|
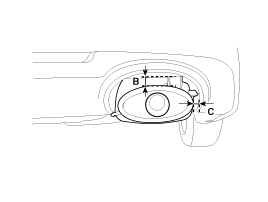
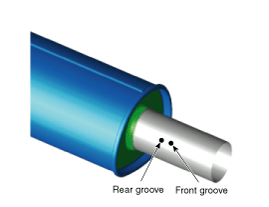
| 2. |
Record the gap (A, B, C, D, E, F) between the tail pipe (or tail trim)
and the rear bumper.
[Pipe type]
[Trim type]
[Bumper-integrated trim type]
|

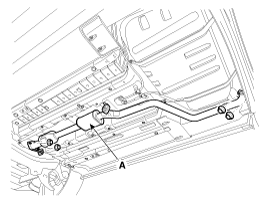
| 3. |
Remove the catalytic converter & center muffler (A).
|
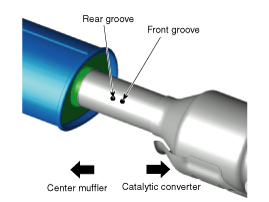
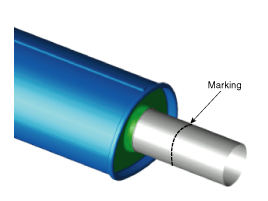
| 4. |
Cut the center muffler as the instruction below.
[With groove]
[Without groove]
[Replacement muffler]
|
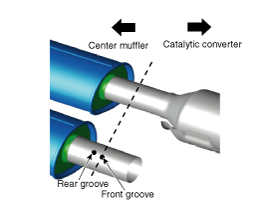

| 5. |
Install the center muffler.
|
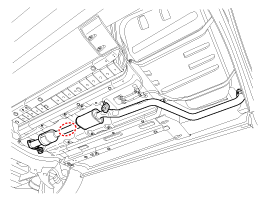
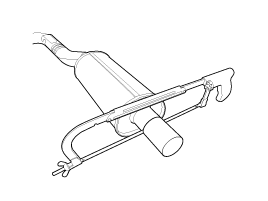
 Muffler Components and components location
Components
1. Front
muffler
2. Center muffler
3. Main muffler
4. Gasket
5. Hanger
...

Other information:
Kia Carens RP (2013-2018) Owners Manual: Electronic power steering (EPS)
Power steering uses the motor to assist you in steering the vehicle. If the engine is off or if the power steering system becomes inoperative, the vehicle may still be steered, but it will require increased steering effort. The motor driven power steering is controlled by the power steering contro ...
Kia Carens RP (2013-2018) Service Manual: General information
Identification Numbers Identification Number Description Vehicle Identification Number 1. World Manufacturer Identifier (WMI) - KNA : Passenger vehicle, MPV(Multipurpose Passenger Vehicle)/SUV(Sports Utility Vehicle)/RV(Recreational Vehi ...
Copyright © www.kicaman.com 2015-2026
