Kia Carens: Crash Pad / Crash Pad Lower Panel Repair procedures
Kia Carens RP (2013-2018) Service Manual / Body (Interior and Exterior) / Crash Pad / Crash Pad Lower Panel Repair procedures
| Replacement |
|

|

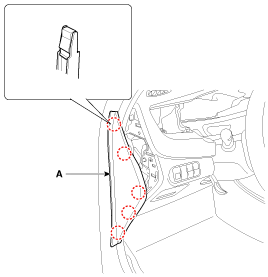
| 1. |
Using a screwdriver or remover, remove the crash pad side cover [LH]
(A).
|
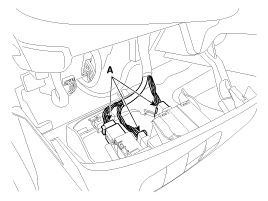
| 2. |
After loosening the mounting screws, then remove the crash pad lower
panel (A).
|

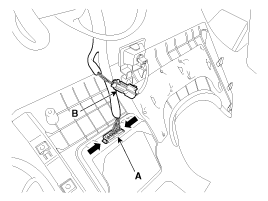
| 3. |
Disconnect the crash pad lower switch connectors (A).
|
| 4. |
Disconnect the diagnosis connector (A) and crash pad under lamp connector
(B).
|
| 5. |
Install in the reverse order of removal.
|
 Crash Pad Lower Panel Components and components location
Component Location
1. Crash pad lower panel
...
 Glove Box Housing Components and components location
Component Location
1. Glove box housing
...
Other information:
Kia Carens RP (2013-2018) Owners Manual: Road warning
Hazard warning flasher The hazard warning flasher serves as a warning to other drivers to exercise extreme caution when approaching, overtaking, or passing your vehicle. It should be used whenever emergency repairs are being made or when the vehicle is stopped near the edge of a roadway. Press th ...
Kia Carens RP (2013-2018) Service Manual: Smart Key Unit Components and components location
Components (1) Connector Pin Information No. Connector A Connector B Connector C 1 V_BAT load C_CAN Low SSB illumination ground 2 ESCL ground ...
Copyright © www.kicaman.com 2015-2026
