Kia Carens: Crash Pad / Cowl Cross Bar Assembly Repair procedures
Kia Carens RP (2013-2018) Service Manual / Body (Interior and Exterior) / Crash Pad / Cowl Cross Bar Assembly Repair procedures
| Replacement |
|

|

| 1. |
Remove the cowl top cover.
(Refer to "Cowl Top Cover")
|
| 2. |
Remove the main crash pad assembly.
(Refer to Crash Pad - "Main Crash Pad Assembly")
|
| 3. |
Disconnect the steering column connectors.
(Refer to Steering System - "Steering Column and Shaft")
|
| 4. |
Down the steering column after loosening the mounting bolts.
(Refer to Steering System - "Steering Column and Shaft")
|
| 5. |
Disconnect the blower unit connectors.
|
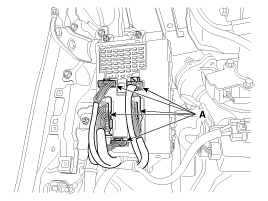
| 6. |
Disconnect the passenger compartment junction box connectors (A).
|
| 7. |
Disconnect the multi box connectors (A).
[Driver's]
[Passenger's]
|
| 8. |
After loosening the mounting bolts and nuts, then remove the cowl cross
bar center bracket (A).
|
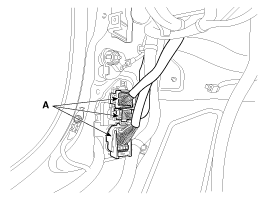
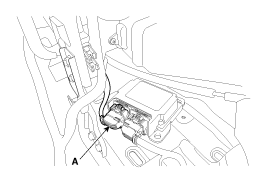
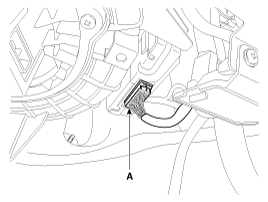
| 9. |
Disconnect the airbag control module (SRSCM) connector (A).
|
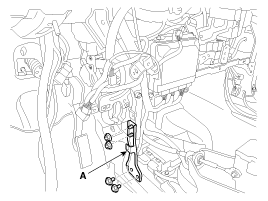
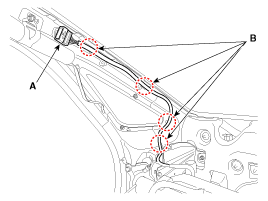
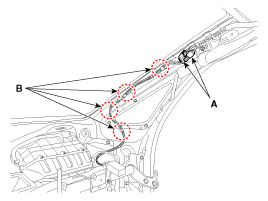
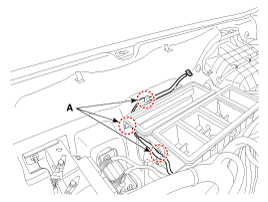
| 10. |
Disconnect the connector (A) and the mounting clips (B) in the front
pillar.
[Driver's]
[Passenger's]
|
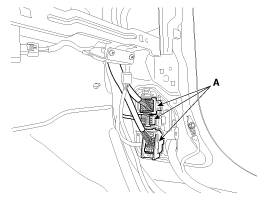
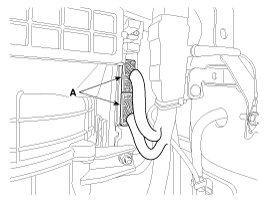
| 11. |
Disconnect the BCM (Body Control Module) connectors (A).
|
| 12. |
Remove the photo sensor wirering mounting clips (A).
|
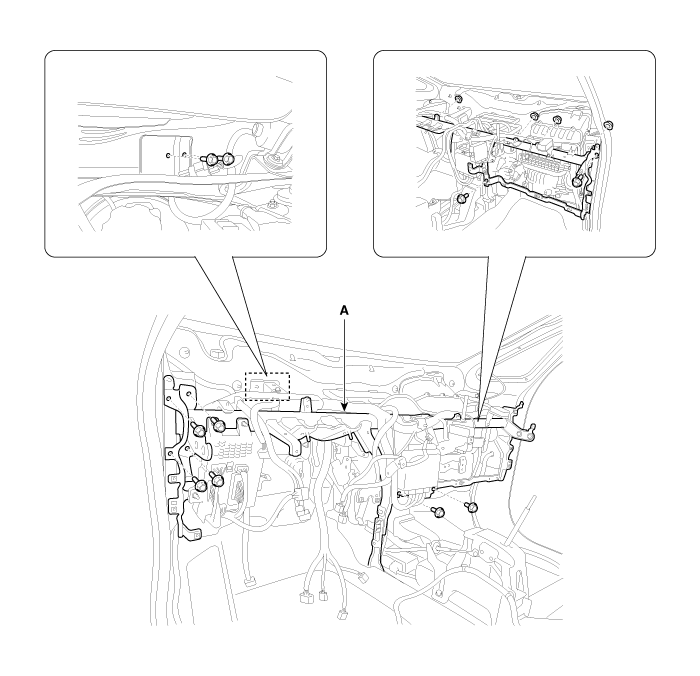
| 13. |
After loosening the mounting bolts and nuts, then remove the cowl cross
bar assembly (A).
|
| 14. |
Install in the reverse order of removal.
|

 Cowl Cross Bar Assembly Components and components location
Component Location
1. Cowl cross bar assembly
...
 Roof Trim
...
Other information:
Kia Carens RP (2013-2018) Service Manual: Rear Combination Lamp Repair procedures
Removal Rear Combination Lamp (Outside) 1. Disconnect the negative (-) battery terminal. 2. Remove the rear combination lamp (A) after loosening the mounting screws. 3. Disconnect the rear c ...
Kia Carens RP (2013-2018) Service Manual: Description and operation
Description EPS (Electric power steering, Column assist type) system uses an electric motor to assist the steering force and it is an engine operation independent steering system. EPS control module controls the motor operation according to information received from th ...
Copyright © www.kicaman.com 2015-2026
