Kia Carens: Driveshaft Assembly / Front Driveshaft Repair procedures
Kia Carens RP (2013-2018) Service Manual / Driveshaft and axle / Driveshaft Assembly / Front Driveshaft Repair procedures
| Replacement |
| 1. |
Loosen the wheel nuts slightly.
Raise the vehicle, and make sure it is securely supported.
|
| 2. |
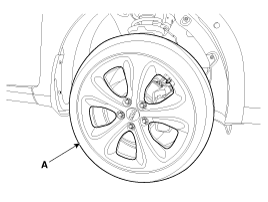
Remove the front wheel and tire (A) from front hub .
|
| 3. |
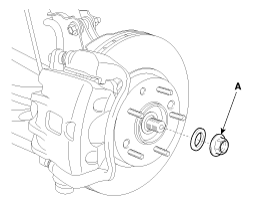
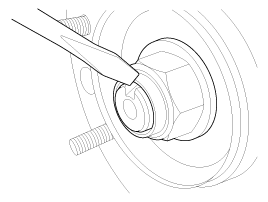
Remove the driveshaft coking nut (A).
|
| 4. |
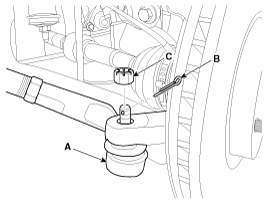
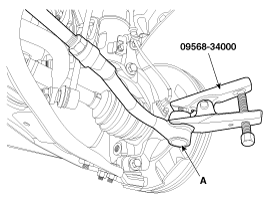
Remove the tie rod end ball joint (A) from the knuckle.
|
| 5. |
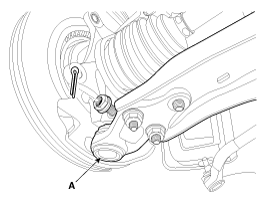
Remove the lower arm (A) from the knuckle.
|
| 6. |
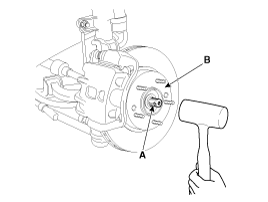
Using a plastic hammer, disconnect driveshaft (A) from the axle hub
(B).
|
| 7. |
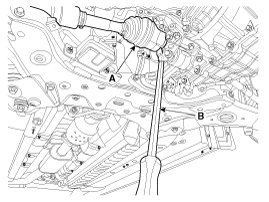
Insert a pry bar (A) between the transaxle case and joint case, and
separate the drive shaft (B) from the transaxle case.
|
| 8. |
Install in the reverse order of removal.
|
| 9. |
Check the front alignment.
(Refer to Suspension System - "Front Alignment")
|
 Front Driveshaft Components and components location
Component
1. Driveshaft (LH)
2. Circlip
3. Driveshaft (RH)
...
 TJ Joint Components and components location
Components
[LH]
1. BJ assembly
2. BJ circlip
3. BJ boot band
4. BJ boot
5. Shaft
6. TJ boot band
7. TJ boot
8. Spider ...
Other information:
Kia Carens RP (2013-2018) Service Manual: SS-A Solenoid Valve(ON/OFF) Repair procedures
Inspection 1. Turn ignition switch OFF. 2. Remove the air cleaner assembly. (Refer to Engine Mechanical System - "Air Cleaner") 3. Disconnect the solenoid valve connector (A). ...
Kia Carens RP (2013-2018) Service Manual: UIP(Ultrasonic Intrusion Protection) Sensor Repair procedures
Removal OFF switch 1. Remove the overhead console lamp. (Refer to Lighting System - "Overhead Console Lamp") Installation OFF switch 1. Install the overhead console lamp. (Refer to Lighti ...
Copyright © www.kicaman.com 2015-2026


