Kia Carens: Air conditioning System / Evaporator Temperature Sensor Repair procedures
Kia Carens RP (2013-2018) Service Manual / Heating,Ventilation And Air Conditioning / Air conditioning System / Evaporator Temperature Sensor Repair procedures
| Inspection |
| 1. |
Turn the ignition switch OFF.
|
| 2. |
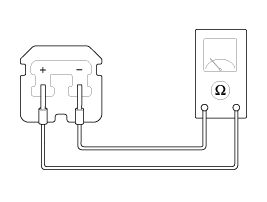
Disconnect the evaporator temperature sensor connector.
|
| 3. |
Measure resistance between terminal “+” and “-” of the evaporator
temperature sensor.
Specification
|
| 4. |
Connect the evaporator temperature sensor connector.
|
| 5. |
Run the engine and turn the A/C switch ON, then measure the voltage
between the terminals of the harness connector.
|
| Replacement |
| 1. |
Disconnect the negative (-) battery terminal.
|
| 2. |
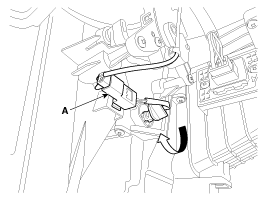
Remove the evaporator temperature sensor (A) by pulling it out after
rotating it 90° in a counterclockwise direction.
|
| 3. |
Install in the reverse order of removal.
|
 Evaporator Temperature Sensor Description and operation
Description
The evaporator temperature sensor will detect the evaporator core temperature
and interrupt compressor relay power in order to prevent evaporator from freezing
by exc ...
 In-car Sensor (DATC only) Description and operation
Description
The In-car air temperature sensor is built in the heater & A/C control unit.
The sensor contains a thermistor which measures the temperature of the inside.
The ...
Other information:
Kia Carens RP (2013-2018) Service Manual: General information
General Troubleshooting Information Before Troubleshooting 1. Check applicable fuses in the appropriate fuse/relay box. 2. Using the battery checker (MCR-570 KIT), check the battery for damage, state of charge, and clean an ...
Kia Carens RP (2013-2018) Service Manual: Special service tools
Special Service Tools Tool (Number and name) Illustration Use Alternator pulley remover wrench (09373-27000) Removal and installation of alternator pulley ...
Copyright © www.kicaman.com 2015-2026


